If you’re a Travefy Pro user, did you know that you can save your own content and events to use on any itinerary or quote that you create? It’s a great way to save any information that you’ve created and use it again and again without ever having to recreate it. Think of it as your own database of information, whether it’s a hotel that you are likely to send clients to, destination guides, tours, and more – it’s your one-stop shop to keep all of your info in one place and use on any itinerary or quote you build on Travefy.
In this article, we will show you how to use your Library (including what the difference is between the different types of information you can save) and ideas of utilizing your Library to the fullest!
What is the difference between an Event and Content?

A piece of Content can be a place or document and will always be included at the bottom of an Event. A place will include rich information like the address, image(s), phone number, description, and more. You can also save files as content (i.e. attachment, PDF) to your Library by following these simple steps.
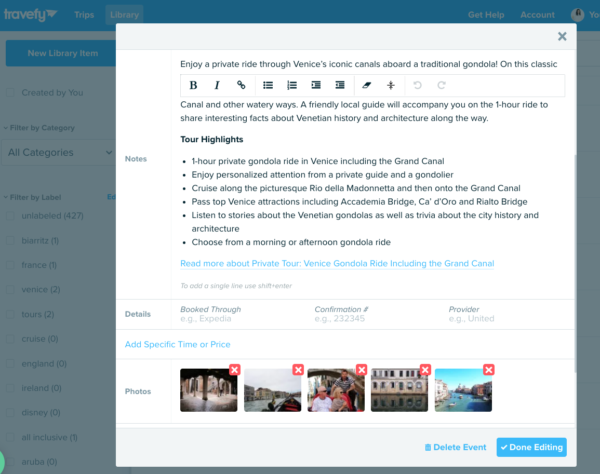
An Event can include an entire event detailing information for an Activity, Lodging, Ground Transport, Cruise, or Info. An Event will allow you to save all of the text around any Content, such as the Event title, time, duration, pricing, multiple images, etc.
The Content and Events work together in Your Library so that you can save them separately and together. Below is an example of how to save a full Event with Content.
- First, go into your Library from your main dashboard and press the “New Library Item” button. Select the type of Event or Content that you would like to create. In this example, I am going to add a hotel first so I want to choose “Place” listed under Content.
- Next, you can add information manually or scroll towards the bottom and press “Search Places Database” and search for the place through our database. Please note that you can always edit the information that we provide as well. Once completed, press “Done Editing” and your Place is now saved to the Library!
- Next, we want to create the Event so we are going to press “New Library Item”, choose Lodging and from here we can add all of the information like check-in time, images, amenities and other notes information, etc.In addition, I can type in the name of the hotel that I have saved as a Place to my Library to make it part of this Event.
- Your Event and Place is finished! You can now add this information when building itineraries or quotes in your Travefy account.
How to Use the Library
Now that you understand the difference between the Content and Event information within the Library, you will quickly find how powerful and time-saving this feature can be! When creating Content and/or Events, you can create it right in the Library on your dashboard, at the top.

You can also save Content and Events directly from an itinerary that you’ve built into the Library by following these steps.
Tips for Utilizing the Library From Travefy Pro Users
What better advice to get than from actual users utilizing their Event and Content Library? Here’s how others are using it:
1. Tours, Activities, and Excursions
“The greatest part of the library feature is saving lots of information on one event. I add photos, paragraphs of information with links, and even documents all into one event that I create once then use over and over again when presenting tours to clients.”
2. Bookables like Travel insurance
“An easy way for me to earn more commission is to highlight additional travel needs within my client’s quote. I will usually add travel insurance information and add it in the Trip Info and Documents section.”

3. Trip Information, Policies, Terms and Conditions
“I add my cancellation policy and terms and conditions to every itinerary I build. This information is extremely important and I like that I can add it to the document that they will be viewing the most in case anything happens.”
Want more? Click here to see more ideas!
Not a Travefy Pro user? Sign up for a free 10-day trial at Travefy.com/Pro!