Are you a travel professional building an itinerary (or multiple) for a group of travelers? If so, we have a tool to simplify the itinerary building process for you! Travefy Pro just released a new feature called “tagging” that allows you to build one itinerary for the entire group and “tag” each traveler in the events that they are part of. This is helpful when tagging travelers on flights, tours, etc. and when you send the itinerary to each traveler, they will receive their specific itinerary designed just for them. Below we will build a trip together and show you how this feature works!
The Trip:
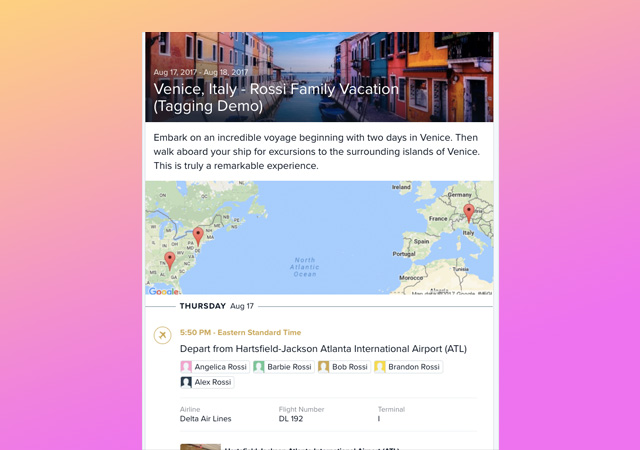
The Rossi family is planning a trip of a lifetime and following their ancestorial roots back to Italy for a family reunion. There will be 10 travelers in total, five travelers will be arriving from Atlanta and five from Philadelphia. Like all families, each member has a different idea of tours they want to take, foods they want to eat, and what they want to do each day. The travel agent they hired may have a lot of work to do but with the help of the tagging tool on Travefy Pro, building this itinerary will be a breeze…
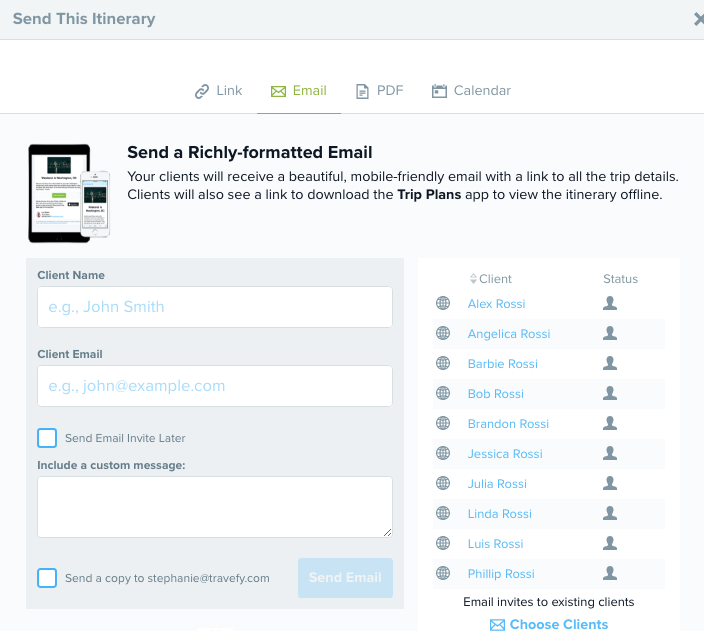
Step 1: Add each family member to the itinerary
You can add each traveler by pressing “Send to Clients” at the top then press “Email”. From here you can begin typing in the name of each traveler with their name and email and be sure to press the box to “Send Email Invite Later”. From here, you can keep adding each traveler and then once completed, you can exit out of the “Send This Itinerary” box.
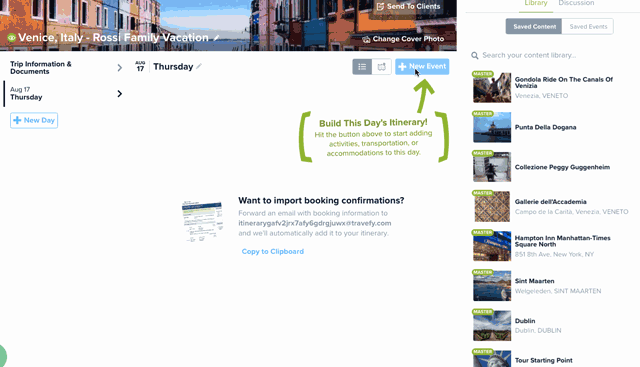
Here is what it might look like once everyone has been added:
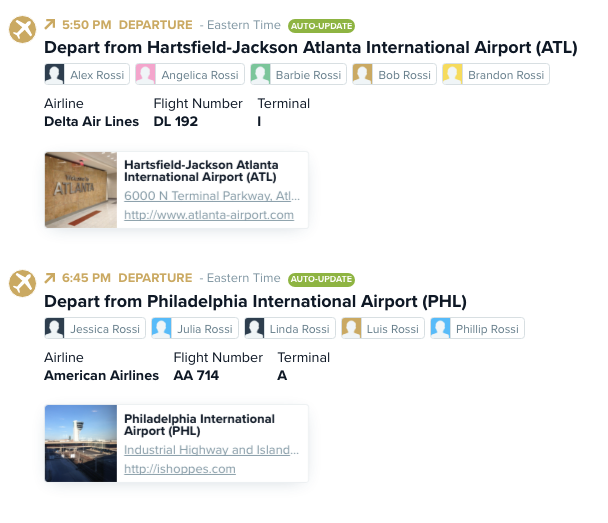
Step 2: Adding flights for each traveler
This agent is going to use the Quick-Add Flight tool to search for both flights and then tag each traveler into their assigned flight.
Now, when each traveler receives their itinerary, they will see the event that they are tagged in instead of every event that the agent has added to the main trip itinerary.
Once the agent has tagged events, the events will appear like this:
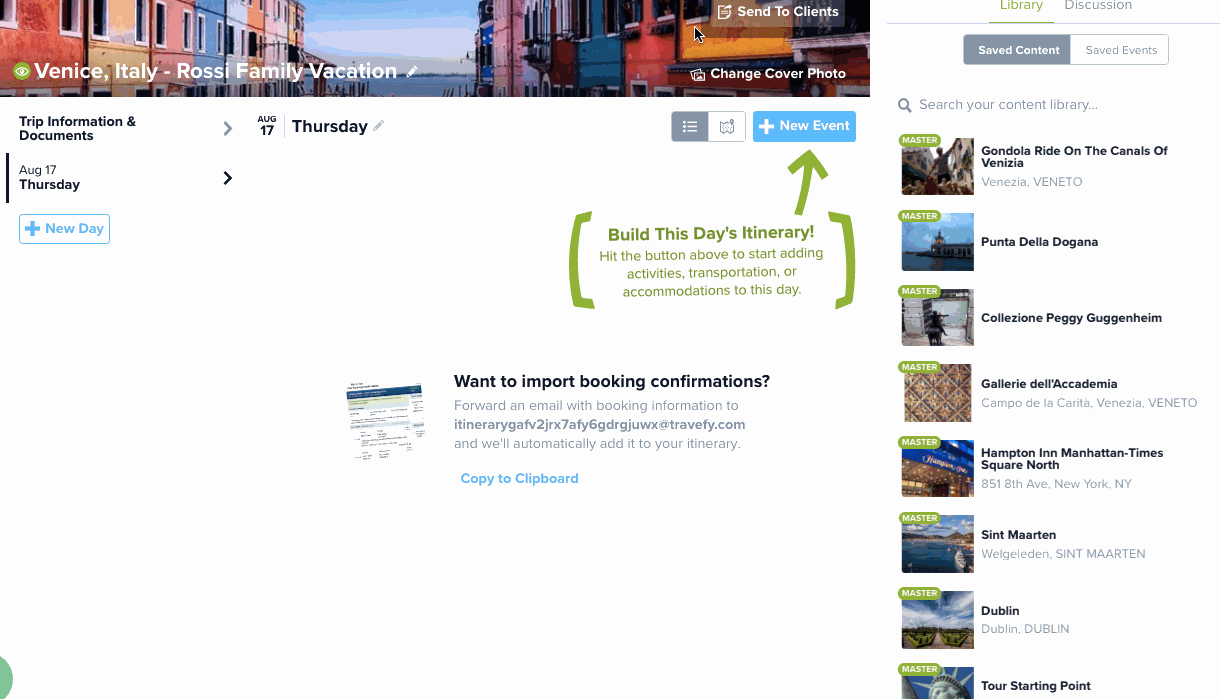
Step 3: Adding all events, including tagged events for activities like tours
Next, the agent will continue to create the itinerary and add everything from information documents for the entire group, hotel information, transportation, and tours (that some family members have opted in on and some will do a different tour).

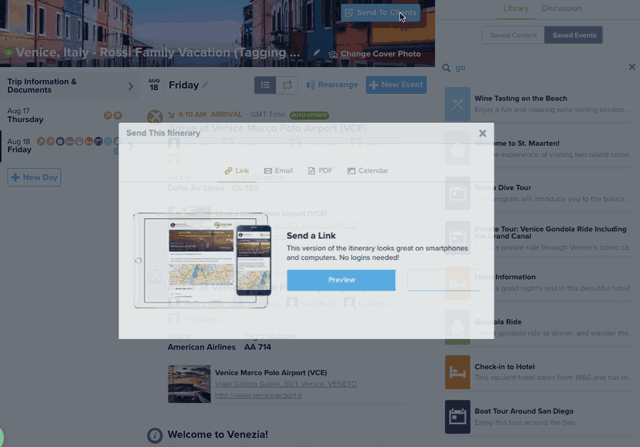
Step 4: Send the itineraries to the group of travelers!
When ready to send the itinerary, press “Send to Clients” at the top. The itinerary can be sent three different ways:
- URL Shareable Itinerary
- “Trip Plans” Mobile App
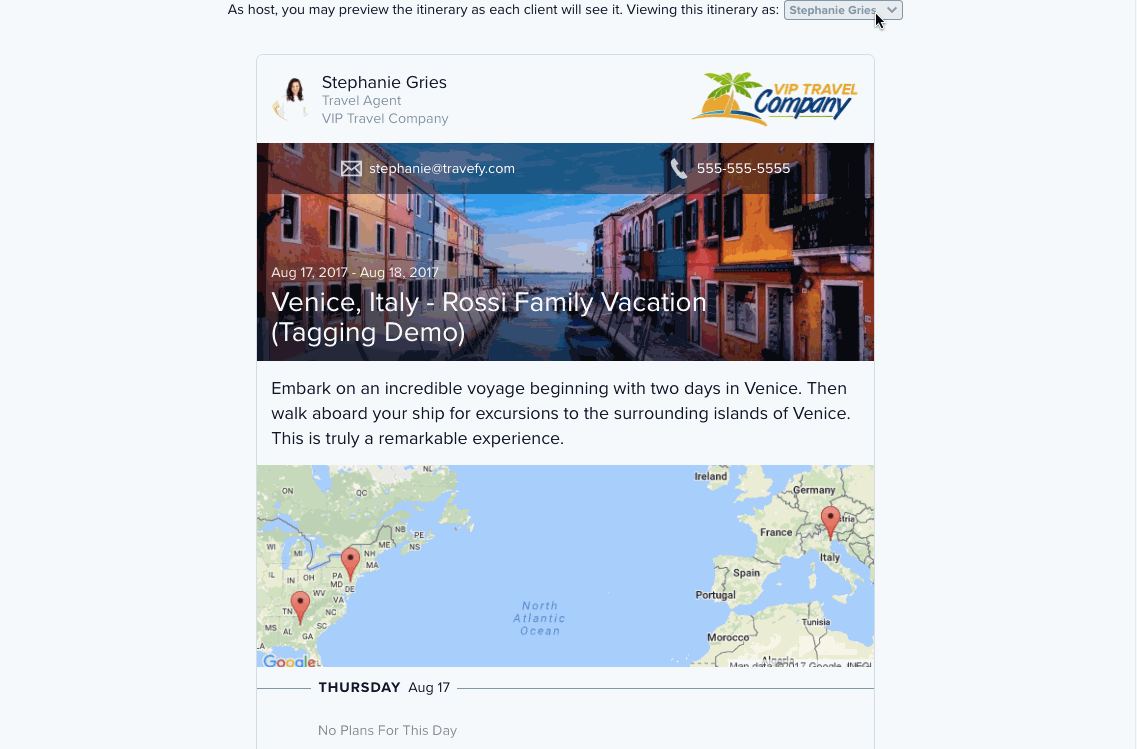
If sharing via the URL Shareable Itinerary, you can view “Preview” and use the drop-down menu to view what it looks like for each traveler:
If you just copy and paste the URL and send that to the client, they will see the entire itinerary, which is why you will want to Email it. Click here to view an example of the URL shareable itinerary.
To email the itinerary, press “Email” then press “Choose Clients”, include an optional custom message and then press “Send” – that simple! Each traveler will receive their personalized itinerary for them self and will have the option to download the Trip Plans mobile app and view their itinerary in there.
When generating and downloading a PDF, the travel advisor can choose which traveler to create a PDF for in the drop-down menu given.
Ready to give the tagging tool a whirl? If you are currently subscribed to Travefy Pro and on the Plus or Enterprise plan, this feature is already available to you. If you are currently on a Starter plan, you will need to upgrade to Plus.